A License to Print Gold?
Ah, the holy grail of 3D printing - being able to produce strong, attractive parts with metal. I’ve been using 3D printing for close to two years and have not strayed far from the safety of PLA. This is my formal introduction to “exotic” filaments, save for a few meters of glow in the dark ABS.
Packaged in a modest brown box is a clear acrylic spool wound with precious ColorFabb BrassFill material. Most spools are opaque black, however the clear allows you to see exactly how much filament is remaining.
The filament looks very much like incense. It has a soft, velvety feel and is very sensitive to pressure. It doesn’t take much tension or twisting to break the almost perfect 1.75mm diameter. ColorFabb does suggest that optimal results are found with direct drive extruders, as the filament is prone to distorting with extreme retraction speeds. The machine I’m using to test the filament is a delta tower with a mechanically geared stepper motor pushing approximately 300mm of bowden tubing to a vanilla 1.75mm J-Head hot end. I will say that I anticipated issues and adjusted my retraction speeds from 60mm/sec to 35mm/sec and from 4.5mm to 3.0mm of length.
After loading the printer and priming the hot end, I set about printing an object at 0.1mm layer height with 10% infill at 206 degrees and 60mm/sec general print speed. I also used the heated bed (which is not required) at 60 degrees. Extrusion was a bit sparse and I cranked the temperature up until maxing at 218. Infill was not extruding nearly enough and turned into a crusty green mess that was being dragged about. I let the print complete until it ultimately jammed at around 90%.
I tried prying the failed print off the heated bed. It crumbled into a million pieces and was obvious that either the temperature was not right or the speed at which I was printing was too great to attain proper flow. I do not believe in adjusting flow rates, as compensating for inadequate fill by simply forcing more material down the tube doesn’t always work. As I had already adjusted temperatures and saw that the crumbling was consistent throughout the height of the model I decided to adjust the speed.
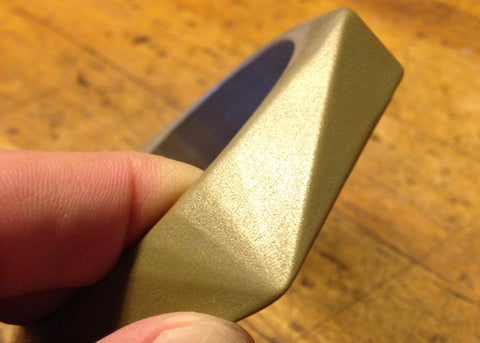
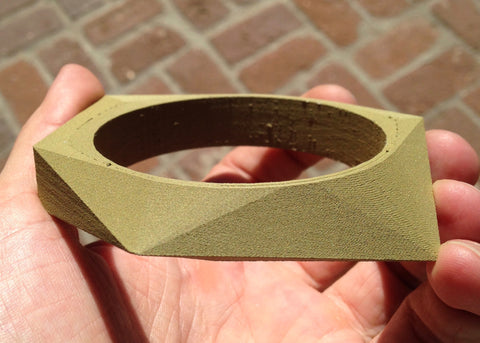
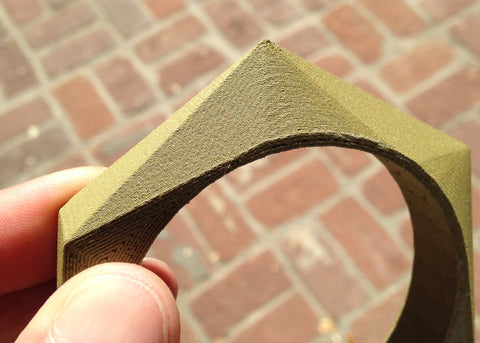
My next print was printed at a modest 0.2mm layer height at 206 degrees, 30% infill, with speeds around 40mm/sec and no heated bed. Flow seemed to be much more consistent and infill welding was looking solid. BrassFill looks like algae, with a deep matte green texture. I found that slowing the print down was the key to allowing the filament to feed properly. The print popped off the blue painter’s tape with little effort and I was pleased to find almost perfect bed adhesion. Bottom infill was tight and held everywhere with no lifting at all.
The first thing I noticed when I picked up the print was it’s weight. It had a substantial feel to it, as though it was important. It felt good to hold and running my fingers along the side it felt like velvet. The layers were very well defined and I could imagine a lot of sanding would be required to bring out the shine of material hiding within.
Ultimately, I ended up printing my object at 0.1mm layer height. This provides more detail to endure the finishing process as well as making it easier to polish.
 |
 |
 |
 |
Finishing and Post Processing BrassFill
Make sure to check back on Friday, October 6th to find out how these prints turn out!